Android 16: Android Linux Terminal Customisations
Introduction
NOTE: I will be updating this post as I learn more about the Android Linux Terminal and AVF so be sure to bookmark it or something.
I purchased the POCO X8 PRO MAX so I could play around with AVF. Please do leave a comment, or email me on m@bana.io, with your experiences, links, ideas and thoughts on this rather useful feature.
Steps
Host
On the host, that is, the device running the quest VM run:
# Add Terminal app to deviceidle whitelist (prevents doze killing)
adb shell cmd deviceidle whitelist +com.android.virtualization.terminal
# Set app standby bucket to active (prevents Android from deprioritizing)
adb shell am set-standby-bucket com.android.virtualization.terminal active
# Grant background run permissions
adb shell cmd appops set com.android.virtualization.terminal RUN_IN_BACKGROUND allow
adb shell cmd appops set com.android.virtualization.terminal RUN_ANY_IN_BACKGROUND allow
# Exempt from power restrictions
adb shell cmd appops set com.android.virtualization.terminal SYSTEM_EXEMPT_FROM_POWER_RESTRICTIONS allow
Guest
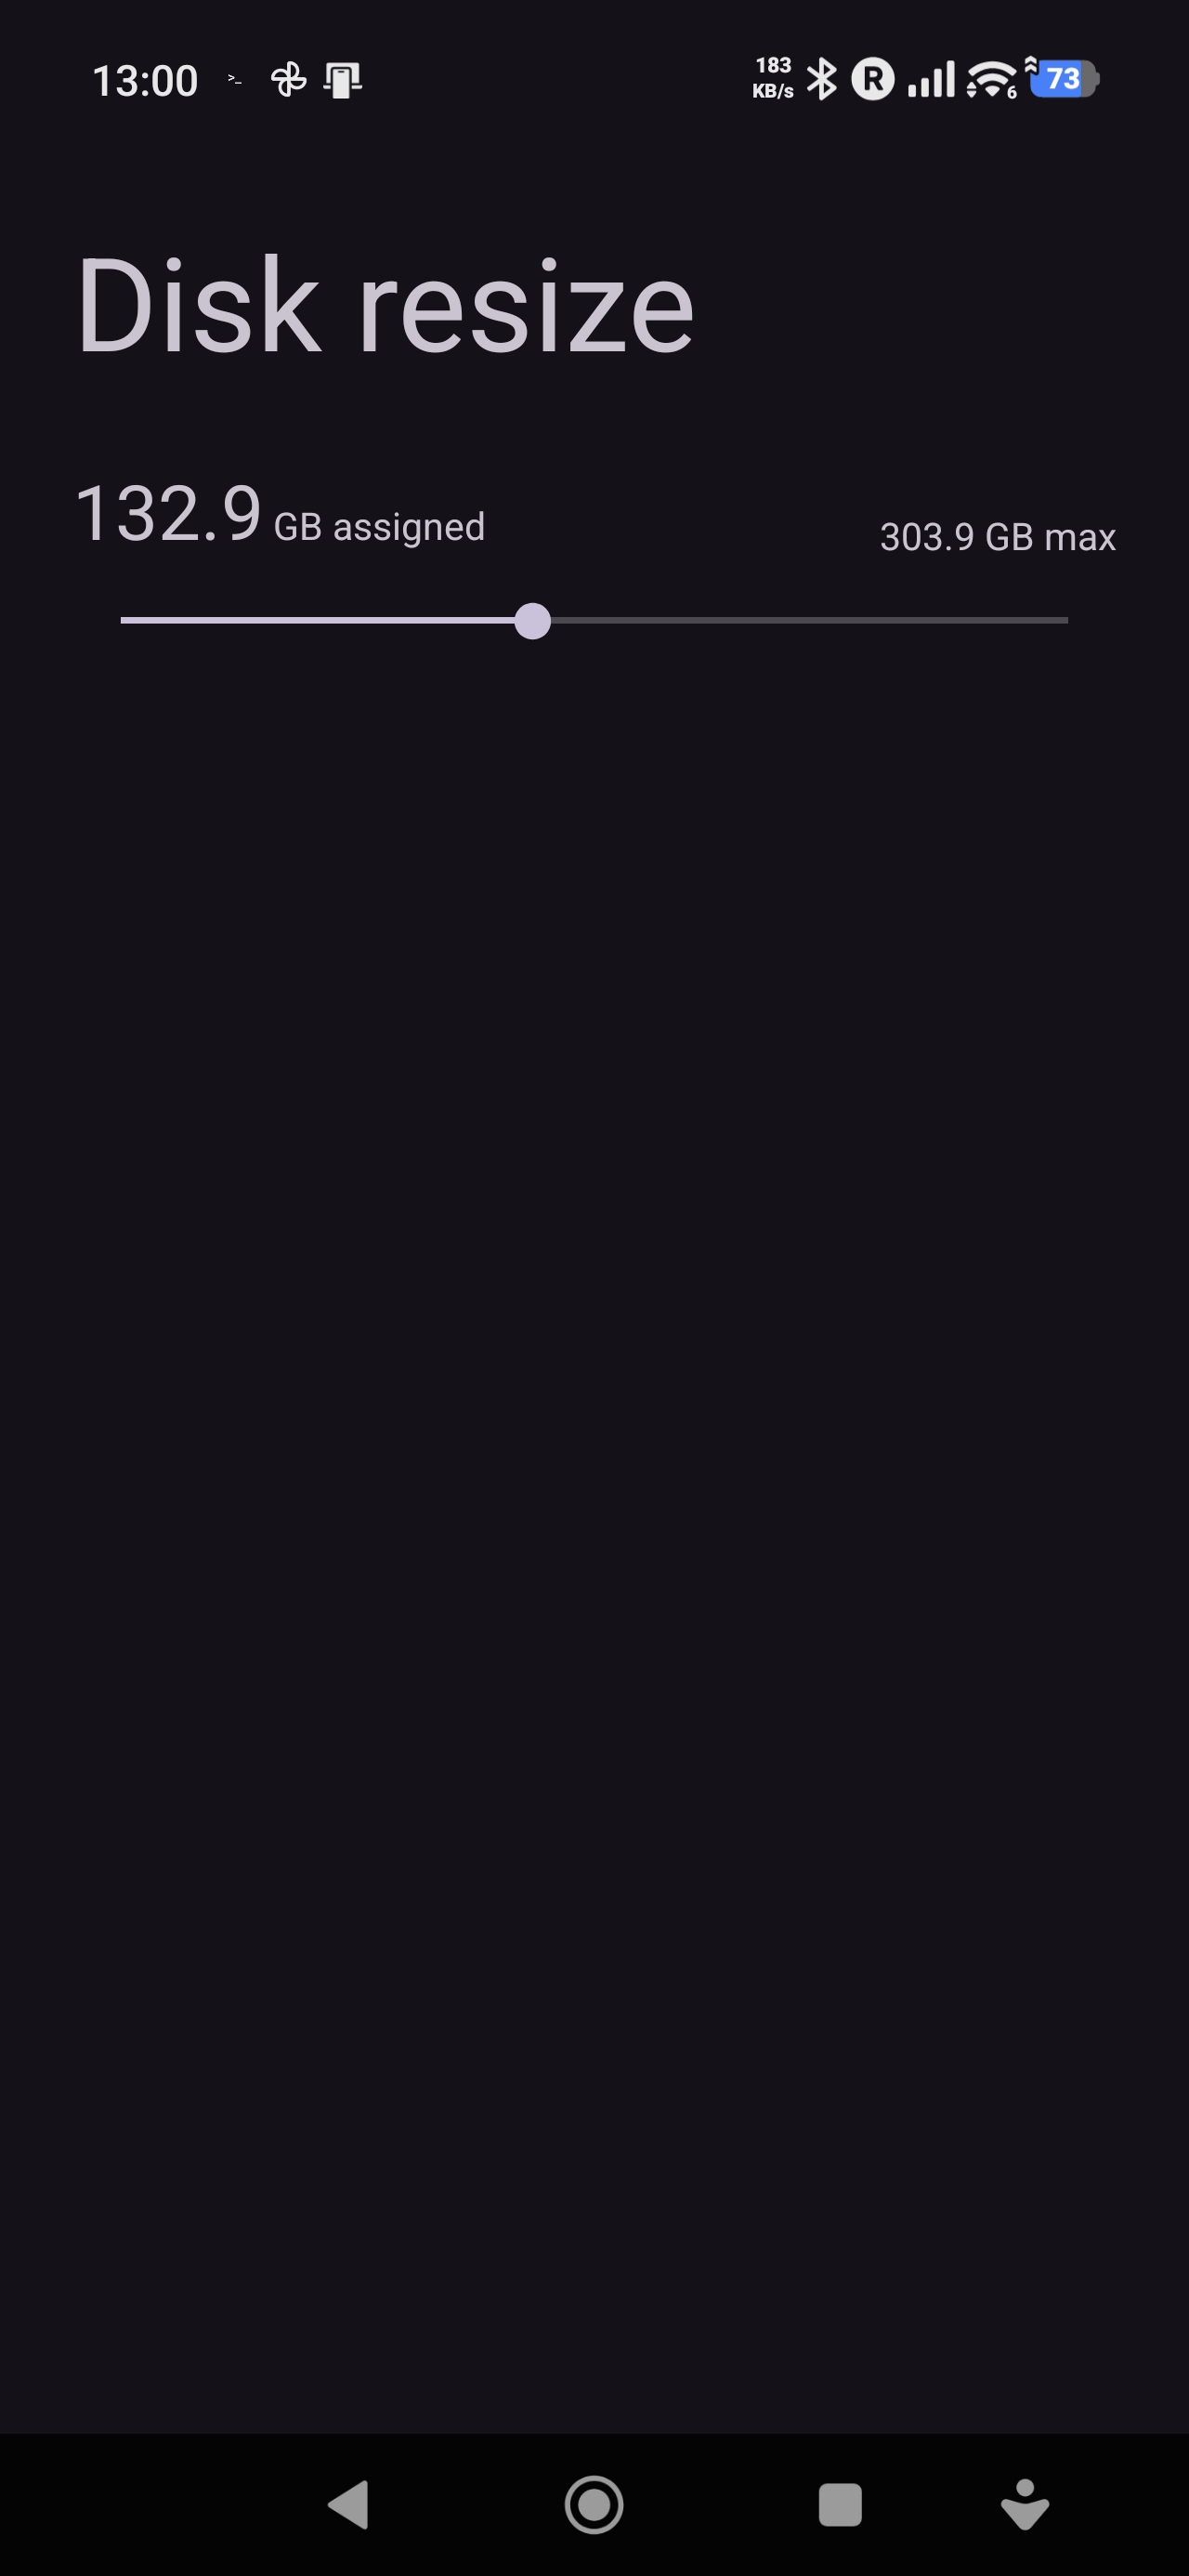
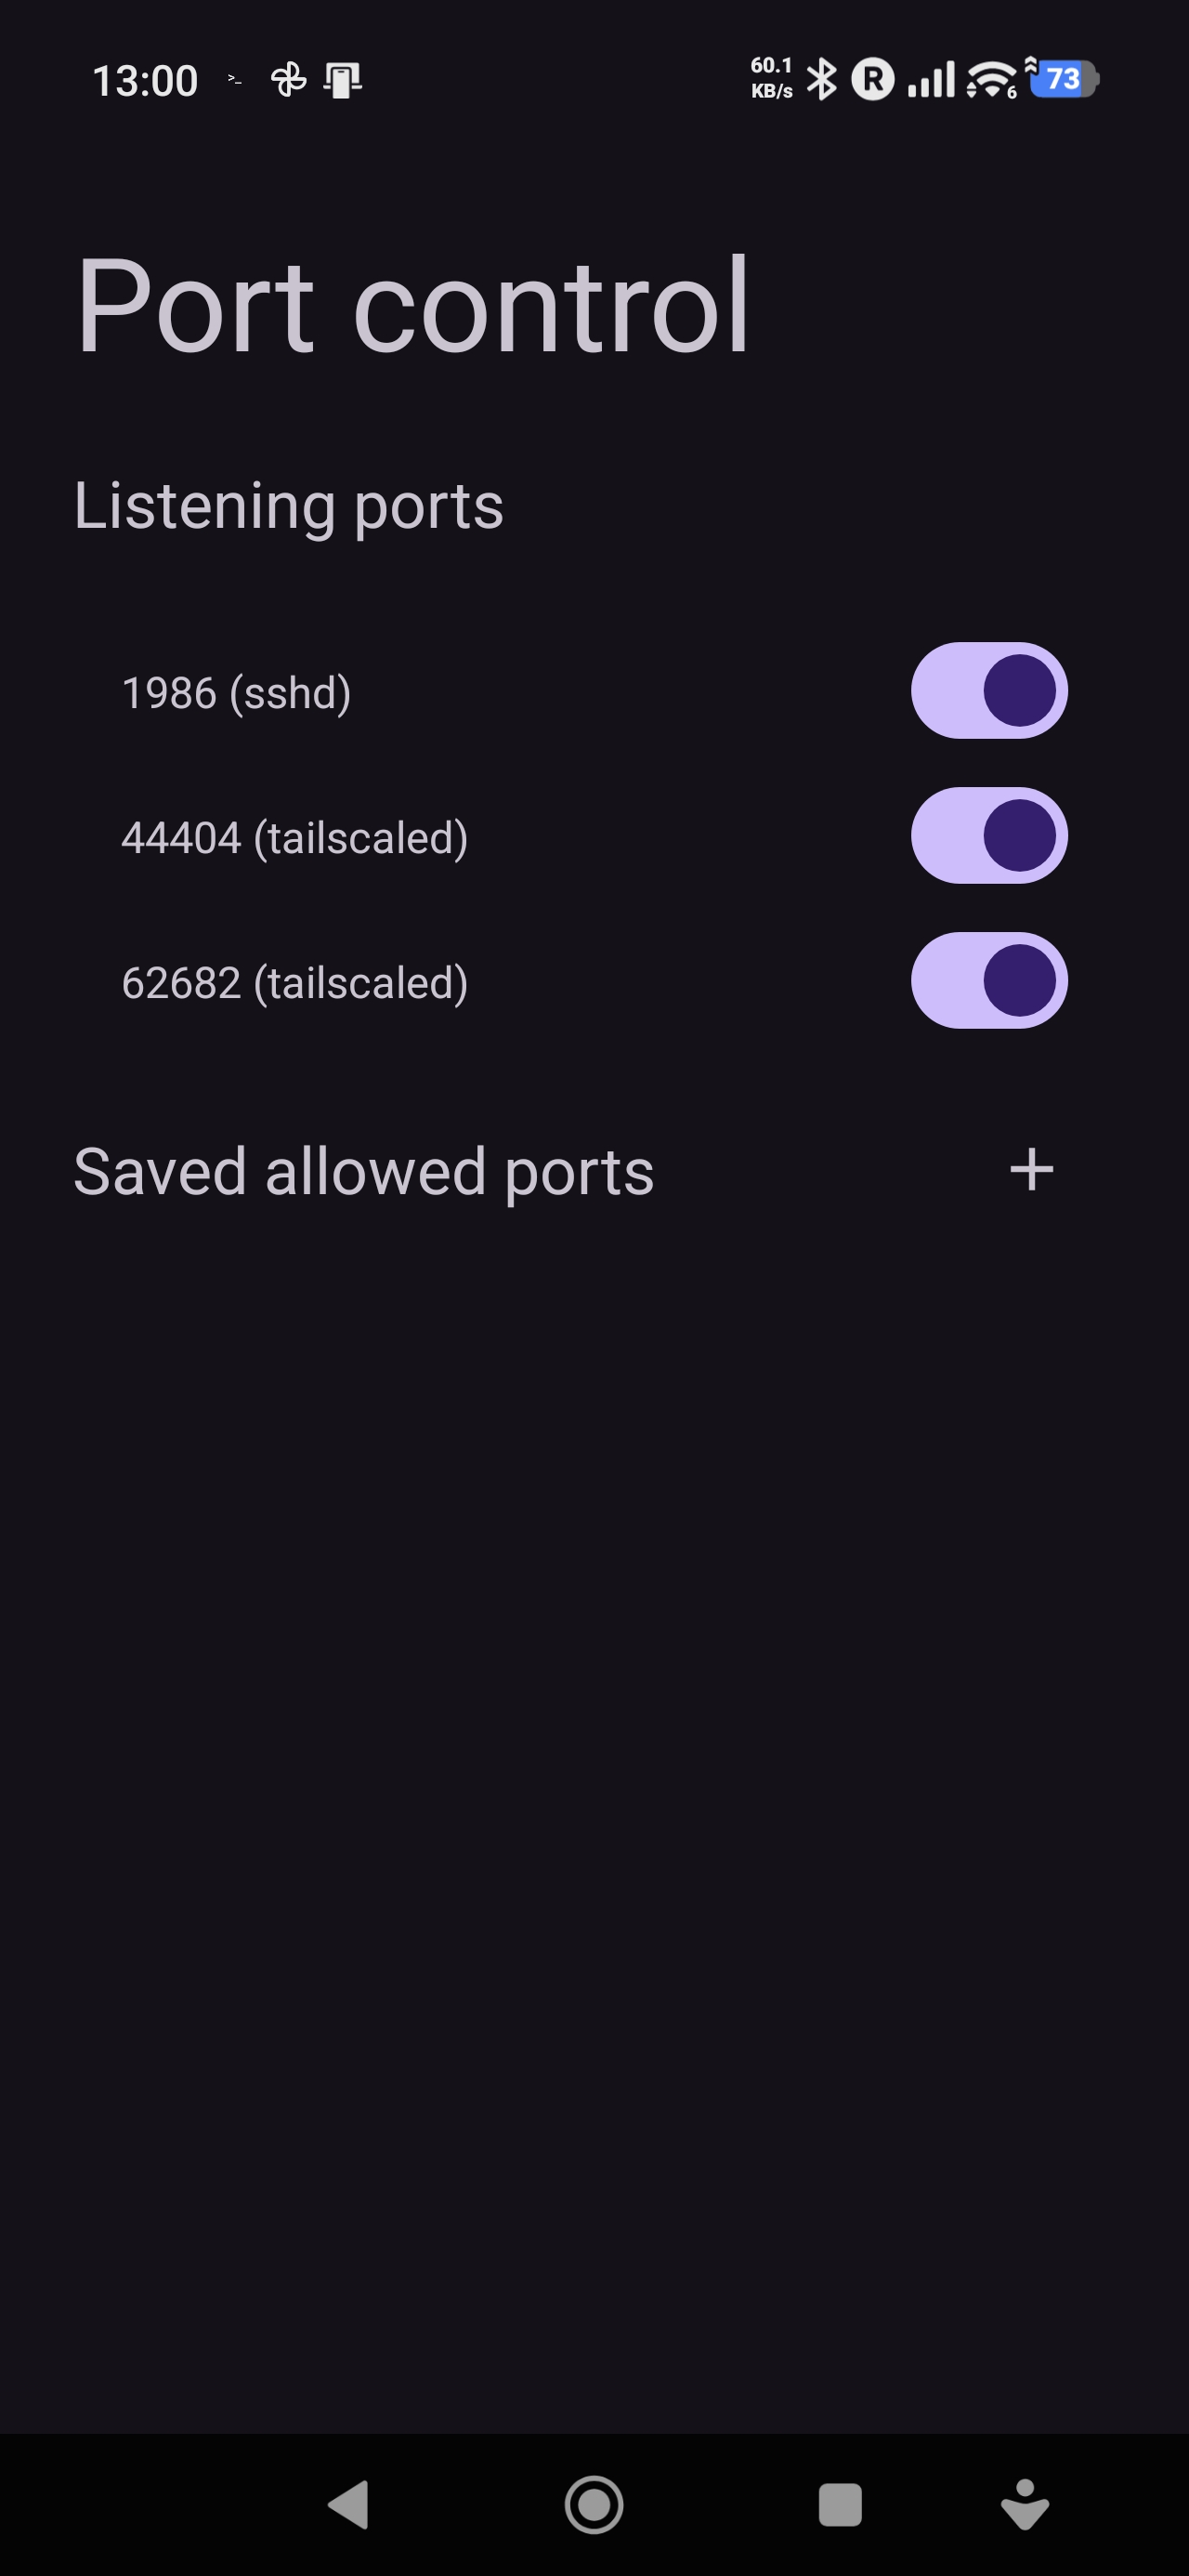
In the Android Linux Terminal application increase the size of the disk allocated to the VM to something reasonable, and add the following listening ports to Port control:
1986.41641.
The last step isn’t, strictly speaking, required but it just prevents annoy notifications on the device. See the screenshots section for an example configuration.
Once you’ve done the above download ./droid.sh and put into the Downloads/dev folder of the host Android device, then create the following files on the Android device all under the Downloads/dev folder:
Downloads/dev/TAILSCALE_KEY: This should be the key used to connect to the tailnet, i.e., the one generated via the admin console.Downloads/dev/id_ed25519: This should be your SSH private key.Downloads/dev/id_ed25519.pub: This should be the corresponding SSH public key.
Finally, run the below within the Android Linux Terminal guest VM to set everything up:
$ bash /mnt/shared/dev/droid.sh --help
$ bash /mnt/shared/dev/droid.sh --verbose --install-nix
The above script—./droid.sh—does many things but most notable are:
- It installs Tailscale, so we can SSH into the VM on local network.
- Install OpenSSH and makes it use port 1986 instead of the default 22.
- Sets the hostname to
droidso that on another machine—that has Tailscale installed—can issue the commandssh -p 1986 droid@droidto remote into the VM. - Optionally installs Nix the package manager, Home Manger and Rust, if
--install-nixis passed in as a flag.
In the event that the VM does not appear in Tailscale, please execute ~/start-tailscale.sh and wait for it appear again. You might need to run this each time the VM starts up, if and only if, you do not see it in your Tailscale. In running the script, you will find that duplicate machines with the name driod appear. Unfortunately, I could not find an easy workaround for this.
Failed attempt to update Debian 13 (Trixie)
This does not work at the moment.
Most of the steps were taken from https://datashelter.tech/blog/upgrade-debian-12-to-debian-13 with some adjustments:
sudo apt update -y
sudo apt upgrade -y
sudo apt full-upgrade -y
# sudo apt autoremove --purge -y
sudo cp -av /etc/apt/sources.list /etc/apt/sources.list.bak
sudo cp -av /etc/apt/sources.list.d /etc/apt/sources.list.d.bak
sudo sed -i 's/bookworm/trixie/g' /etc/apt/sources.list
sudo sed -i 's/bookworm/trixie/g' /etc/apt/sources.list.d/debian.sources
# Do the actual update now, then reboot if required.
sudo apt update -y
sudo apt upgrade -y
sudo apt full-upgrade -y
if [ -f /var/run/reboot-required ]; then sudo reboot; fi
Screenshots
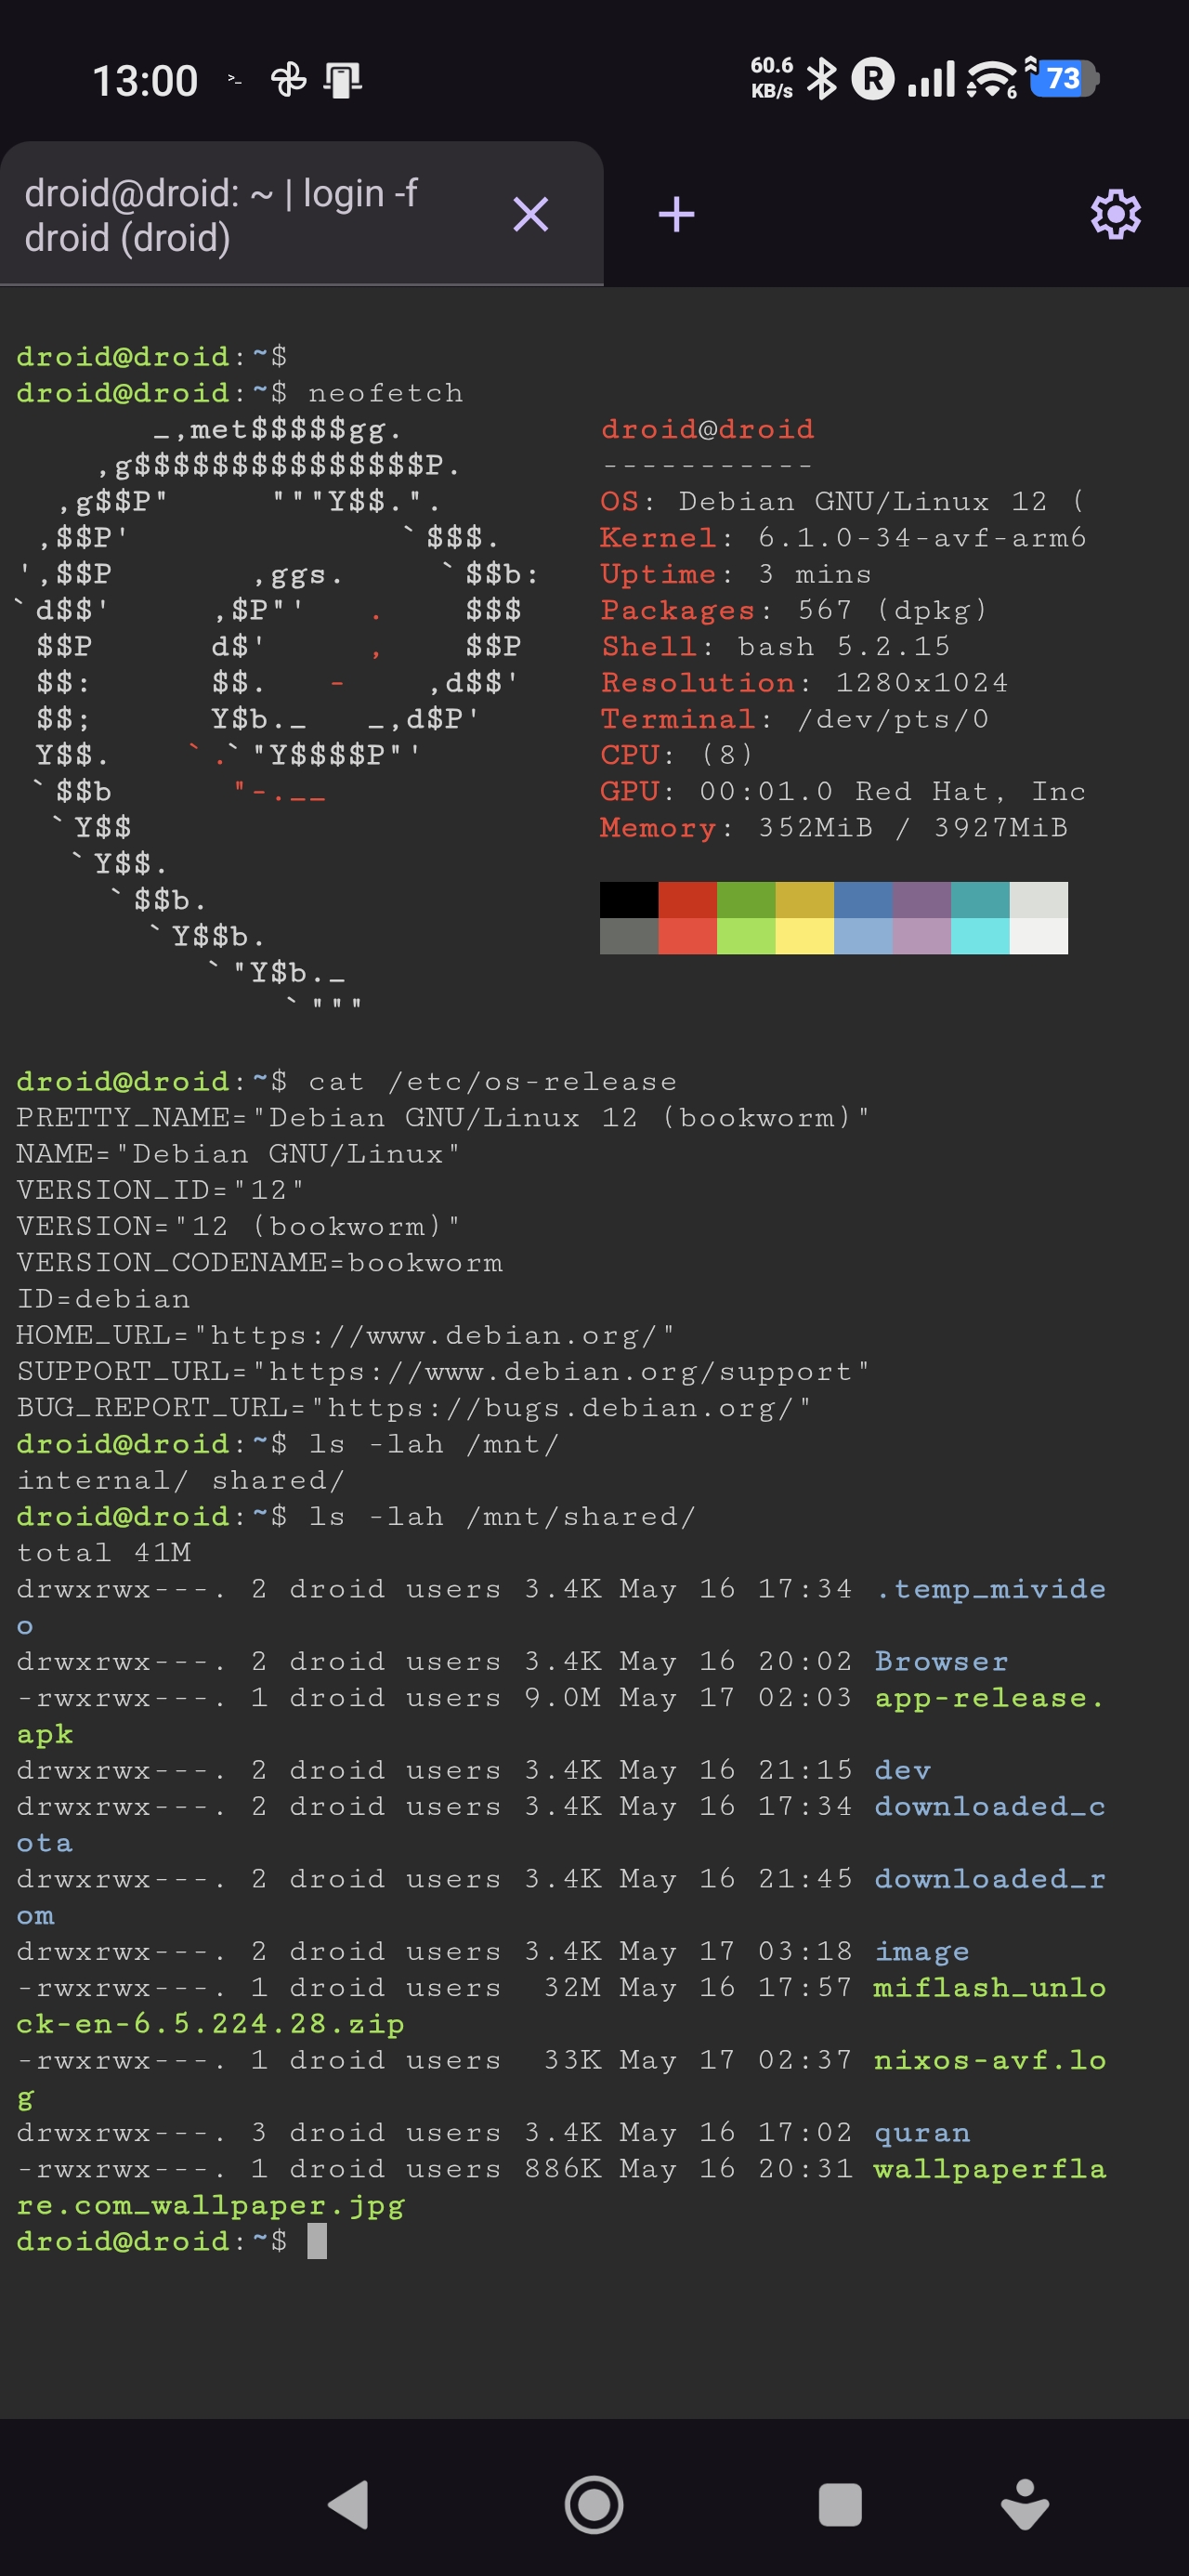
Final result
Note: You are able to access the host device at /mnt/shared.
Disk resize
Assigned ports
Issues found or questions I have
I have a huge lists of TODOs so I can’t document everything I’ve found so far but below are some:
- Without a rooted phone how does one go about debugging issues?
- Sometime the VM randomly terminates in a middle of a, I think, a command that consumes a lot of IO.
- Without using Tailscale, or a similar technology, I cannot directly SSH into the VM from within the same network. I can obviously ping the VM from the host Android phone from within Termux without a problem. I don’t want to have to setup an additional piece of software just to forward to the guest VM, that’s rather annoying.
- Why didn’t they just reuse the Termux interface? The one being shipped in the version of Android I have, 16, is rather clunky. The keyboard for instance seems to randomly break and not respond to any keypresses.
- The default VM size is rather low which is understandable given the usecases intended for AVF. I would have liked an option in the UI to select a different sized VM altogether without having to manually constantly switch to the size I want, I do know that on a rooted device this is much easier to configure.
Again, I would love to hear back from people using this and how they’ve overcome the issues they are facing.
References
Some of the more interesting things I found are listed below: